Welcome to the tech page AKA “behind the scenes” page. Here I will be describing and showing pictures of some of our props and how I built them. I hope you find them informative and enjoy the pictures. This hobby we’re part of is all about sharing. So please feel free to try these ideas for yourself and make some elements to add to your Christmas Lights at your own home. You don’t need to have 10’s of thousands of lights blinking to music to enjoy setting out something that you built to add to your lighting display. *Updates and newest items added to bottom of page.
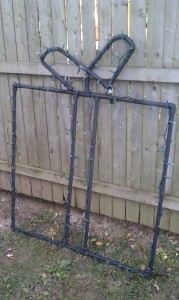
The first item I’m pretty proud of are my gift packages. These are made from 3/4 PVC pipe that you can find at any hardware store. All you need to make these is the pipe, 90 degree fittings, T fittings and end caps. Some people in the hobby add sand to the inside but I left mine hollow. You will need some type of pipe cutter, PVC primer/glue and I used a heat gun for the bends. Here’s a picture of my larger one complete.
As you can see the corners are the 90 degree fittings and the T fittings are near the center to form a ribbon that would be wrapped around a package. I use 5 T fittings on these packages, 4 for the top and bottom of the “ribbon” and one facing up away from the main body of the box/package. This 5th fitting allows you to glue a pipe in the top to form the bow on top. Again, some people use sand to prevent the PVC from kinking at the bends. I wasn’t too worried about that as the PVC disappears after painting it black. Here is a closer picture of it. One thing to mention about this picture. This is an older picture with regular incandescent lights that were not secured down to the frame. I now use M6 full wave LED lights that are all zip tied down to the frame to be much more uniform.
Thinking of getting into this hobby? You better like wires! When our voice over announcer says we have over 1/4 (closer to 1/2 now) mile of extension cords, we’re not kidding! LOL
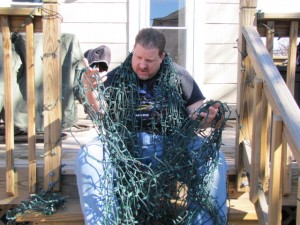
This is what a two-day 1600 light mega tree tangle looks like. “Thanks Hon for helping untangle this” and for keeping my cool. 🙂
If you look at the picture of our previous home and see the 10 mini trees lined up these are made from funeral wreath hangers! I learned this from an article on Planet Christmas and from attending classes at the Christmas Expo. These tripod stands have two longer legs and one shorter leg so the wreath would be held with a lean. To make these into trees that stand straight you cut the longer legs to the same length as the shorter one so you end up with a triangle sitting straight with no lean. Don’t worry if you aren’t perfect, these usually are set up in grass so just push them in so they are straight.
From here you just start wrapping the trees with lights. I started at the top and used the small hook the wreath usually goes on to hold the first bulb. When the string crosses a leg attach it with a zip tie. You can skip some but I would try and have several zip tied to hold the strings neat and orderly. It was recommended to use 3 100 count light strings but I only used 200. Either way will give you lots of light. Also having plenty of lights will help in case you drop a few bulbs or half or even a full string. I found wreath hangers at a craft store.
The rather large white items hanging in the trees next to our driveway are snowflakes. These are actually made out of wood, molding to be exact. I used 1/2″ by 3/4″ molding. I picked a size of 36″ I think as the overall size. I then found the center point and notched each of the pieces so they would interlock with each other to form a plus (+). Then I took a piece and made two 45 degree cuts so it would be a cross piece to connect two of the large “legs” but before I attached them I made another piece a few inches long and secured it to the piece with the 45 degree cuts with a dry wall screw. Make sure to drive the screw in from the side that will be towards the center of the snowflake. Now you’ll have a piece that will resemble the letter ‘T’ and the flares going down from the top of the T. Put this in between the “legs” and attach it with a staple gun. Repeat this 3 more times and you may want to vary the length. Once you have everything attached it may seem a bit flimsy but once you coat it with some thick exterior paint and wrap the wire strands around it you’ll notice it gets more rigid. I also added a small hook at what will be the top of the snowflake.
I didn’t really “Wrap” the light strands but more so “lined” it with the lights and secured every bulb with a clear zip tie. I used 100 M6 LED lights and had a few extra that I ended up wrapping were I could. If you make yours a little smaller you could probably use the 70 count of M6 LED lights as those strings are about 22.5-23 feet long. The 100 count is about 33 feet long. If you use yours as I did as a hanging prop I’d suggest using white extension cord and running it down to the center of the snowflake and zip tying it so it locks into one of the center pieces after plugging in the light string. I use electrical tape to help prevent rain form getting in so I use white tape for this as well. After using a zip tie for the plug then use 2 or 3 more zip ties to hold the extension cord to the upper section so it won’t flop around. I also found that having it up against the house and wanting them to always face out the use of fishing line worked great to hold them in position.
2016 update –
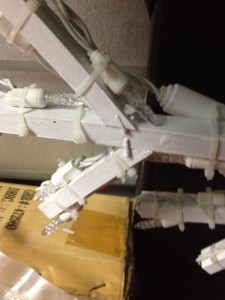
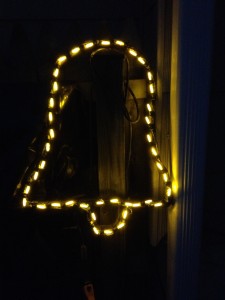
One of our newest props are bells. These were made mostly for the song “Snoopy and the Red Barron” since there are several spots in the song that have “village bells” ringing. We use them during other songs too. My wife asked if I could make bells and as I was in our basement trying to think of how I could make the arch of the bell I noticed my hand truck nearby. I had borrowed a tool from my brother-in-law that is an electrician that is used to make bends in PVC without it kinking. I heated up the section of PVC and bent it with the tool and zip tied/cable tied it to the hand truck to get the arch I wanted. I then let it cool and then took the heat gun to one side at a time and heated a small section and used the tool to flare it out. I again let it cool then heated another small section a few inches from the flare out and used the tool to bend the pipe back down. I then decided on a length, I think I just used the cross brace of the hand truck for uniformity. Now I had the shape of the bell but wanted a bottom and ringer. I took a short length of the pipe heated it really well and bent it around a larger can of baked beans that were on the pantry shelf. 🙂 To complete the construction I used 2 90 degree elbows and two T fittings. The elbows created the edges of the bell and the T fittings allowed the ringer to be glued into position. To make them look a bit different and kind of give them the look that there are not in unison I positioned them in different spots along the bottom of the bell. I then spray painted them flat black so they would not be visible until the lights turned on. I then strung them with 1 string of 50 M6 LED lights. I used gold/yellow color lights to give the look of brass. This was more than enough to go around twice to give good close outlining of the frame and even had some left over I used black out caps to cover the extra bulbs. Below are the photos of the bells in the different stages of construction and completion.
*These were not used in our 2017 display as we have not reprogrammed the song “Snoopy and the Red Barron” yet. We will try and get both the song and these bells back in our show/display for 2018. 🙂
Any questions, please email us.
More to come…


